Oreo Cake Pops: A Complete Guide to No-Bake Bliss
Oreo cake pops offer all the flavor of a rich dessert with the fun, portable style of a sweet snack. Whether you’re looking for simple treats for family gatherings or unique party favor ideas, these chocolate-covered pops deliver. In this guide, I’ll walk you through every step. Read on to explore how to create Oreo cake pops that look great and taste even better.
What Are Oreo Cake Pops?
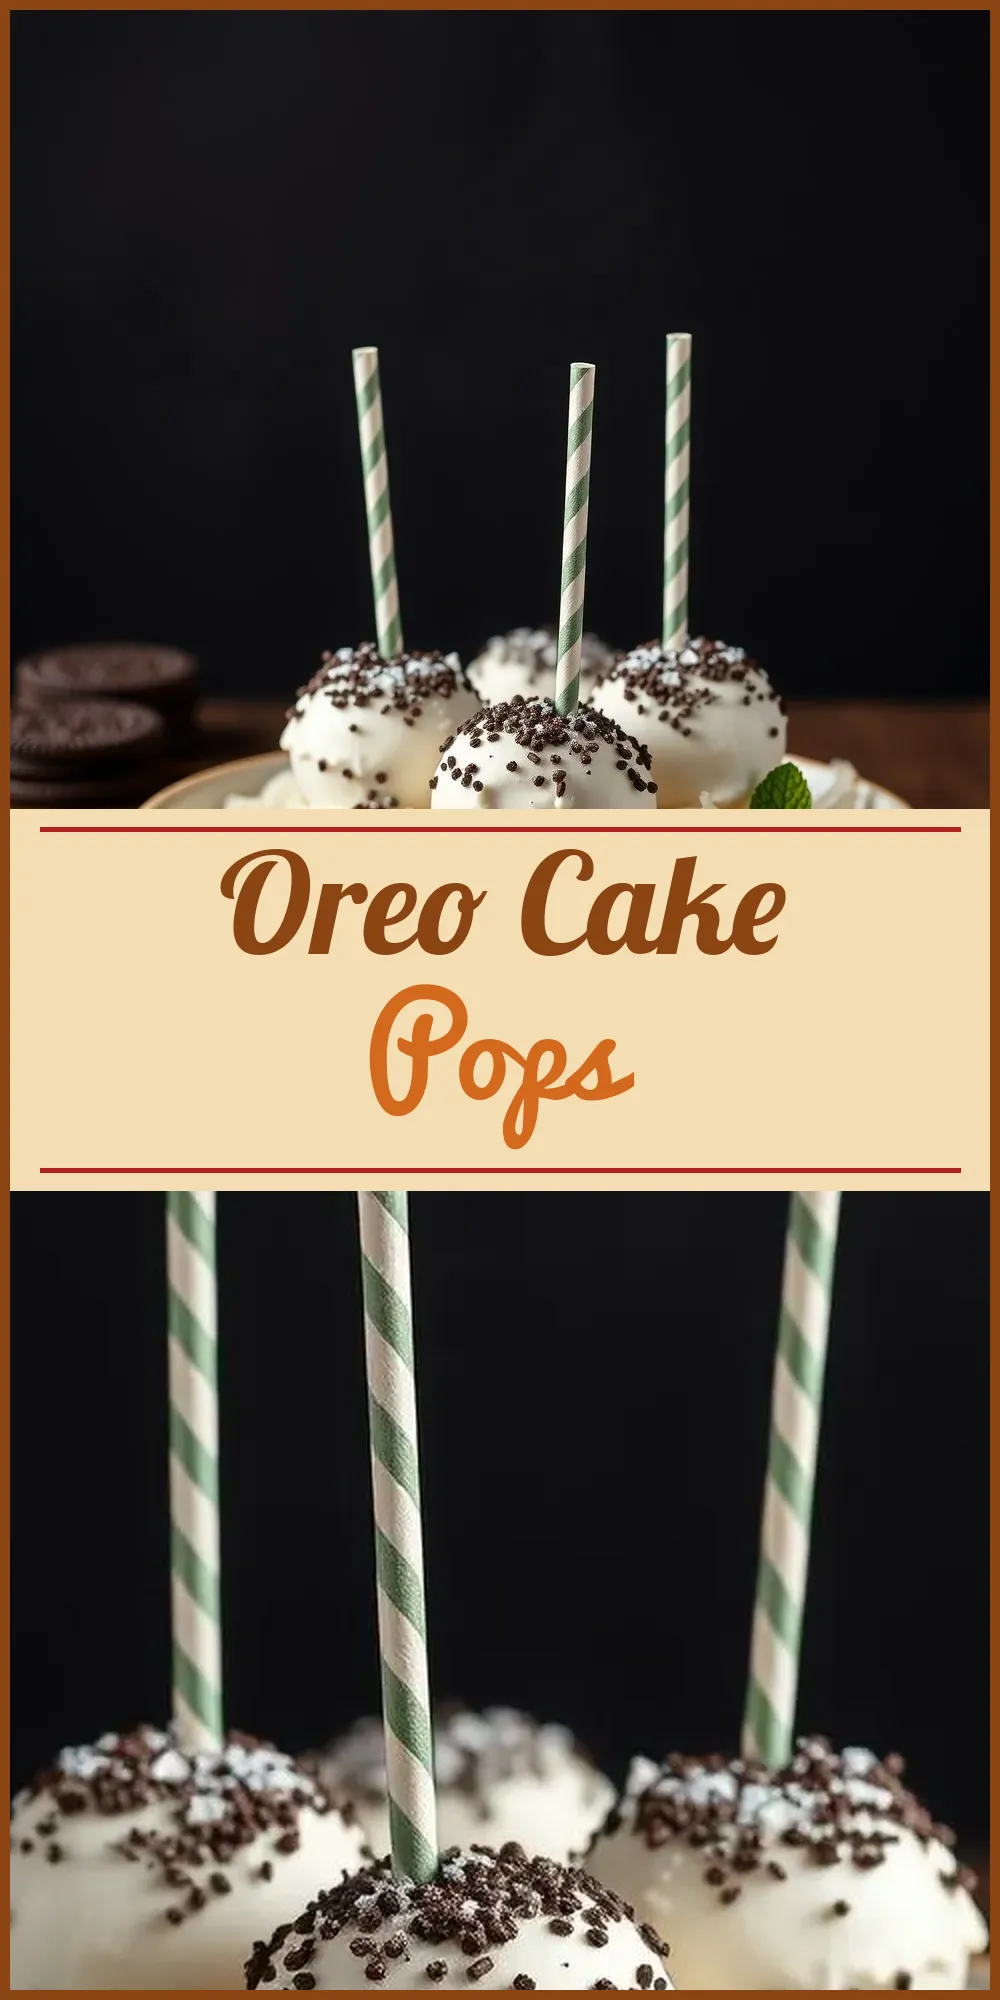
Oreo cake pops are bite-sized truffles coated in a crisp chocolate shell. They start with crushed Oreo cookies mixed with cream cheese to form a soft, dough-like filling. Each ball is shaped, chilled, dipped in melted chocolate, and decorated for extra flair. Serve them on sticks, just like classic cake pops, or go stick-free for a more casual treat.
The beauty of Oreo cake pops lies in their simplicity and adaptability. You don’t need to bake or fuss with multiple bowls. Oreo cake pops require only a few main ingredients and minimal prep time, making them a truly approachable dessert for anyone.
Why Make Oreo Cake Pops?
There’s something irresistible about Oreo cake pops. Here’s what makes them so appealing:
- No Oven Required: These treats are completely no-bake, perfect for when you want dessert without heating up the kitchen.
- Quick Assembly: Only three key ingredients get you started.
- Fun for All Ages: Get kids involved in shaping, dipping, and decorating.
- Versatile Presentation: Match their decorations to any celebration, from birthdays to baby showers.
- Economical: Oreos and cream cheese are affordable staples, so you can make a large batch without breaking the bank.
The Best Ingredients for Oreo Cake Pops
The quality of your cake pops hinges on your ingredient choice. Here’s a breakdown of what you need:
| Ingredient | Purpose | Notes |
|---|---|---|
| Oreo Cookies | Forms the chocolatey base | Regular or double-stuffed both work well |
| Cream Cheese | Binds crushed cookies | Use full-fat for smoother texture |
| Candy Melts or Chocolate | Creates the crunchy coating | White, milk, or dark chocolate meltable wafers |
| Coconut Oil/Shortening (optional) | Thins melted chocolate | Helps for a smoother dip |
| Sprinkles/Crushed Oreos/Drizzle | Adds decoration | Get creative with toppings |
Equipment You’ll Need
Getting your setup right makes the process go smoothly:
- Food processor or zip-top bag and rolling pin
- Mixing bowl and spoon
- Baking sheet and parchment paper
- Cake pop sticks or lollipop sticks
- Microwave-safe bowl for melting chocolate
- Styrofoam block or cake pop stand
Don’t worry if you don’t have every tool; you can make do with basic kitchen gear.
Step-by-Step: How to Make Oreo Cake Pops
1. Crush the Oreos
Use a food processor for the finest crumbs—this gives your pops a smoother texture. No processor? Place Oreos in a sealed bag and crush with a rolling pin. Aim for a consistency like coarse sand.
2. Mix with Cream Cheese
Soften the cream cheese to room temperature for easy mixing. In a large bowl, blend the crumbs and cream cheese until evenly combined. The mixture should easily hold together when pressed.
3. Shape the Pops
Roll tablespoons of the dough into balls about 1 inch in diameter. Try to keep them uniform for even chilling and dipping. Arrange them on a baking sheet lined with parchment.
4. Chill the Balls
Freeze the Oreo balls for 15–20 minutes. Chilling firms them up, making them less likely to fall apart during dipping.
5. Prepare the Chocolate Coating
Melt candy melts (or chopped chocolate) in a microwave-safe bowl. Heat in short bursts and stir often. Add up to a teaspoon of coconut oil or shortening, if needed, to thin the coating.
6. Attach the Sticks
Dip each stick into a bit of melted chocolate before inserting it halfway into a chilled Oreo ball. This helps anchor the stick and stops it from pulling out later. Chill for another 10 minutes to set.
7. Dip and Decorate
Working one at a time, submerge each pop into the melted chocolate. Gently tap off excess coating. While the chocolate is still wet, add sprinkles, mini chocolate chips, or drizzle with another shade of chocolate. Stand pops in a foam block to let them set.
8. Let Set and Serve
Refrigerate cake pops for about 10 minutes to finish setting the shell. Serve them cool or at room temperature.
Decoration Ideas and Variations
Personalizing Oreo cake pops is half the fun. Here are some ways to add visual interest and flavor:
- Classic: White chocolate coating with crushed Oreos sprinkled on top
- Festive Themes: Colored candy melts and holiday-themed sprinkles
- Drizzle: Zigzag melted dark chocolate for contrast
- Glitter Sugar: Roll pops in edible shimmer for a sparkling finish
- Mini M&Ms or Candies: Press them into the coating for a playful look
Swap in flavored Oreos for different tastes, or try marbled chocolate coatings by swirling two types together.
Tips for Success
Small adjustments yield big improvements in outcome:
- Use a food processor to pulverize cookies for a better texture.
- Ensure the cream cheese is fully softened for a smooth, lump-free mixture.
- Freeze balls before and after inserting sticks to prevent sliding and to keep pops secure during dipping.
- Avoid overheating your chocolate; gentle melting keeps it glossy and easy to work with.
- Only decorate while the coating is wet so toppings stick.
If decorating several at a time, keep undipped pops chilled and work with one at a time. This keeps the centers firm for best results.
Troubleshooting Common Issues
Even with a simple recipe, you might hit a snag. Here’s how to fix common problems:
| Issue | Solution |
|---|---|
| Pops falling off sticks | Dip sticks in melted chocolate to anchor, chill after inserting |
| Chocolate coating is too thick | Add a little coconut oil or shortening to thin |
| Pops crack after setting | Pops were too cold when dipped; let them warm slightly before coating |
| Toppings won’t stick | Decorate quickly before chocolate hardens |
Ways to Serve and Use Oreo Cake Pops
Oreo cake pops suit different occasions:
- Plate them up as party bites
- Wrap them individually and add ribbons for gift bags
- Arrange them on a cake pop stand as a centerpiece
- Present them as birthday party favors or bake sale treats
- Hand them out for holidays, showers, or family movie nights
Because they’re simple to make ahead, you can prep large batches for events without stress.
Storing and Freezing
To keep Oreo cake pops fresh and ready to enjoy:
- Store: Place pops in a single layer in an airtight container. If stacking, separate layers with parchment or wax paper. Keep refrigerated for up to 5 days.
- Freeze: Wrap each cake pop in plastic wrap, place in a freezer-safe container, and freeze for up to 3 months. For best taste, thaw overnight in the fridge before serving.
Well-stored cake pops retain their texture and flavor, making them an excellent plan-ahead dessert.
Frequently Asked Questions
Can I use store-brand sandwich cookies instead of Oreos?
Yes, many off-brand chocolate sandwich cookies work well.
Do I have to use candy melts?
No. You can substitute white, milk, or dark chocolate chips. Just add a bit of coconut oil or shortening to help with dipping.
Can I make Oreo cake pops without a stick?
Absolutely. Roll the mixture into balls, dip in chocolate, and serve them as truffles.
Oreo cake pops combine creamy centers and crisp shells into one easy treat. No baking, minimal fuss, maximum payoff. Each aspect—from crushing the cookies to dipping and decorating—lets you add your own touch. Whether you keep it classic or experiment with new looks and flavors, these pops are sure to disappear fast.
Try a batch for your next celebration or quiet night in. Chances are, you’ll be putting this no-bake favorite on repeat.

Oreo Cake Pops
These Oreo cake pops are a fun and easy treat. You only need five ingredients. They can be ready to go in no time.
Ingredients
- 12 ounces white candy melts
- optional decorations: sprinkles, crushed Oreos, melted chocolate (for drizzling)
- 1 (8 ounce) block cream cheese, softened
- 1 teaspoon coconut oil or shortening
- 36 Oreo cookies
Instructions
- Place all the Oreos in a food processor. Pulse until they’re fine crumbs. Alternatively, crush them in a Ziploc bag with a rolling pin until fine. Place the Oreo crumbs in a large mixing bowl. Add softened cream cheese. Mix until fully combined. Make sure the mixture is smooth.
- Scoop about 1 to 1.5 tablespoons of the mixture. Roll into small balls about 1 inch in diameter. Place the balls on a baking sheet lined with parchment paper. Freeze for 15-20 minutes until firm.
- Place the white chocolate melts in a microwave-safe bowl. If you’re using coconut oil or shortening, add it to the melts. This helps create a smoother finish. Microwave in 15-20 second intervals. Stir between each interval. Continue until the chocolate is fully melted and smooth.
- Dip the tip of each cake pop stick into the melted white chocolate. Insert the stick into an Oreo ball. This helps the sticks stay in place. Place the pops back on the baking sheet. Freeze for 10 more minutes to set.
- Dip each Oreo pop into the melted white chocolate. Cover it completely. Gently tap off the excess chocolate. While the coating is still wet, decorate with sprinkles, crushed Oreos, or drizzle with melted milk or dark chocolate as desired.
- Insert the pops into a styrofoam block or cake pop stand. Let the chocolate harden completely. For quicker setting, refrigerate the pops for about 10 minutes.